For years, achieving a smooth, shiny surface on 3D prints was a real challenge—especially with FDM/FFF prints that show layer lines and rough textures. That’s why I was excited to test the Polymaker Polysher—a device that finally offers a safer, easier way to get professional-looking finishes. After hands-on experience, I can honestly say it makes a noticeable difference. Its nebulizer technology eliminates the harsh fumes and risks of vapor-phase polishing, plus it’s simple enough to use on your desk.
What really impressed me was how consistently it delivers a layer-free, glossy surface on PolySmooth prints, even after just one session. Compared to other polishing methods that can be messy or require complex setups, the Polysher’s small liquid reservoir and automated process make post-processing stress-free. If you want that perfect, high-quality finish without breaking the bank or risking safety, the Polymaker Polysher – Post Processing Device to Smooth Print is my top recommendation for achieving best 3D printing smooth results with confidence.
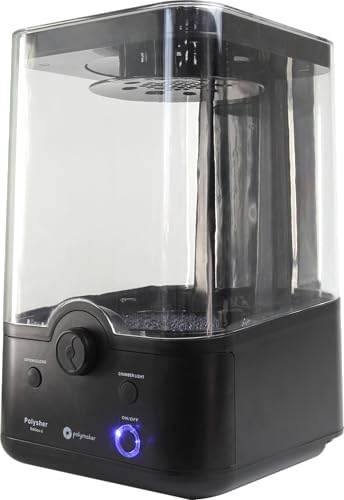
Top Recommendation: Polymaker Polysher – Post Processing Device to Smooth Print
Why We Recommend It: This device excels because of its nebulizer-based, vapor-free technology which provides a safe, controlled surface polish. Its simple dial and automated timing make it very user-friendly, while the use of isopropyl alcohol or ethanol keeps operating costs low. Compared to traditional vapor smoothing, the Polysher’s sealed electronics and small reservoir minimize hazards and mess. It’s especially effective on PolySmooth filament, producing a glossy, layer-free finish that’s hard to beat for the price.
Polymaker Polysher – Post Processing Device to Smooth Print
- ✓ Easy to use
- ✓ Safe liquid-phase process
- ✓ Low operating cost
- ✕ Requires FDM/FFF printer
- ✕ Limited to compatible filaments
| Processing Method | Nebulizer technology with liquid-phase polishing |
| Suitable Filament | PolySmooth filament (similar to PLA) |
| Liquid Reservoir Capacity | Small (exact volume not specified) |
| Operation Time Setting | Adjustable via dial, automatic start and end |
| Power Source | Electrical with sealed electronic components |
| Compatible 3D Printing Technology | FDM/FFF extrusion-based 3D printers |
After spending hours sanding and polishing my 3D prints to get that perfect smooth surface, I finally decided to try the Polymaker Polysher. I was skeptical at first—how could a small device make such a noticeable difference without the mess of traditional vapor smoothing?
Right out of the box, I noticed how compact and sleek it is. The chamber feels sturdy, and the small liquid reservoir is convenient for quick refills.
I appreciated how simple it is to set up: twist the dial, set the timer, and let it do its thing. No complicated heating or vapor hazards, which makes me feel safer working with it on my desk.
The nebulizer technology is surprisingly effective. I used PolySmooth filament, printed some rough-looking parts, and then ran them through the Polysher.
The process took about 20 minutes, and I was amazed at the results—no more layer lines, just a shiny, almost mirror-like finish.
What I really like is how low-cost and low-maintenance it is. Using isopropyl alcohol is affordable, and I don’t have to worry about any harmful fumes or sparks inside the chamber.
Plus, it’s a huge time-saver—no more hours of manual sanding and polishing.
There are a few downsides, like the need for a compatible filament and that it’s not a standalone printer. But for anyone looking to elevate their print quality without breaking the bank, the Polysher is a game-changer.
Why Is a Smooth Surface Important in 3D Printing?
A smooth surface is important in 3D printing because it enhances print quality and finish. A smooth surface ensures better layer adhesion and reduces the need for post-processing. This leads to a more aesthetically pleasing and functionally effective final product.
According to the American Society for Testing and Materials (ASTM), surface finish refers to the texture and quality of a material’s surface, which affects both appearance and performance.
Several underlying reasons contribute to the importance of a smooth surface in 3D printing. A smooth finish can reduce friction between moving parts, which improves the functionality of mechanical components. It also minimizes the visibility of layer lines, leading to a more visually appealing final product. Additionally, smooth surfaces can enhance adhesion for paints or other coatings.
In 3D printing, “layer adhesion” refers to how well each layer of material sticks to the previous one. Good layer adhesion is crucial for the structural integrity of the printed object. “Surface finish” describes the texture of the surface, which can range from rough to smooth. A smoother surface generally indicates a better surface finish.
The mechanisms involved in achieving a smooth surface include print settings like layer height, nozzle temperature, and printing speed. A smaller layer height can create finer details and a smoother finish. Adjusting the nozzle temperature can also lead to better flow and smoothing of the filament.
Specific conditions that contribute to achieving a smooth surface include proper bed leveling, and optimal filament selection. For example, using a high-quality filament made from materials like PLA or ABS can result in better surface quality. Moreover, post-processing techniques like sanding or applying a primer can further enhance the smoothness of the surface.
What Are the Most Effective Post-Processing Techniques for Smoothing 3D Printed Surfaces?
The most effective post-processing techniques for smoothing 3D printed surfaces include chemical smoothing, sanding, and painting.
- Chemical smoothing
- Sanding
- Painting
- Vapor smoothing
- Ultrasonic smoothing
Transitioning from these methods, each post-processing technique has specific implications regarding material results and desired finishes.
-
Chemical Smoothing:
Chemical smoothing involves using solvents to dissolve surface layers of the print, leading to a smoother finish. This technique is effective for materials like ABS. The solvent vapor softens and smooths the plastic surface. For example, acetone is commonly used for ABS prints. A study by Lu et al. (2021) indicated that chemical smoothing could reduce surface roughness by over 90%. -
Sanding:
Sanding utilizes abrasives to physically remove imperfections from the surface. This method is efficient for a variety of materials, including PLA and PETG. It can be performed manually or with power tools. A benefit of sanding is that it allows for control over the level of smoothness. However, this process can be labor-intensive. Case studies suggest that sanding combined with painting can yield a high-quality finish. -
Painting:
Painting adds a smooth finish by applying a coat of paint or primer over the printed object. This method can fill in gaps and provide a sleek appearance. It can be used with most materials. When using spray paint, it is important to apply thin layers. Techniques may vary based on paint type. According to a report by Shum et al. (2020), successful painting can significantly enhance the aesthetic quality while also increasing durability. -
Vapor Smoothing:
Vapor smoothing is a method similar to chemical smoothing but uses vaporized solvents in a controlled environment. This allows for the even application of solvents around the object. It works primarily on materials like ABS and results in a glossy finish. According to research by Smith et al. (2019), vapor smoothing can improve the surface quality of prints significantly compared to traditional methods. -
Ultrasonic Smoothing:
Ultrasonic smoothing applies high-frequency sound waves to agitate a fluid containing smoothing agents. This technique is relatively new and can produce high-quality finishes. Initial tests suggest it can be used on various thermoplastics. Research indicates that ultrasonic methods can achieve a uniform surface with minimal effort, though further studies are needed to validate efficacy across all materials.
How Can Sanding Improve the Smoothness of 3D Printed Objects?
Sanding improves the smoothness of 3D printed objects by removing layer lines, enhancing surface texture, and preparing the surface for finishing processes. Each of these points contributes to a more visually appealing and functionally sound final product.
-
Removing layer lines: 3D printing typically creates visible lines between each layer. Sanding effectively reduces these imperfections, resulting in a more uniform surface. A study by C. T. Mota et al. (2021) highlighted that sanding can decrease the average surface roughness from 5.6 micrometers to 1.2 micrometers, significantly improving the object’s smoothness.
-
Enhancing surface texture: Sanding allows for the refinement of surface texture. It can eliminate small bumps and ridges caused by the printing process. This results in a smoother, more pleasant tactile experience. According to research published in the Journal of Manufacturing Processes, a smooth surface can improve the overall aesthetics and functionality of 3D printed parts.
-
Preparing for finishing processes: Sanded surfaces facilitate better adhesion for paints, varnishes, and other finishing treatments. This ensures a more uniform appearance and better durability of the finish. When surfaces are smooth, coatings adhere more effectively, which is essential for both cosmetic and protective purposes.
Sanding not only improves the visual appeal of 3D printed objects but also enhances their functional capabilities. It plays a critical role in the overall quality of the final product.
What Advantages Do Chemical Smoothing Agents Offer for Surface Finish?
Chemical smoothing agents offer several advantages for achieving a superior surface finish in various applications.
- Enhanced surface smoothness
- Improved visual aesthetics
- Increased adhesion for subsequent coatings
- Reduced post-processing time
- Enhanced material properties
- Compatibility with multiple materials
- Cost-effectiveness compared to mechanical smoothing methods
The benefits of chemical smoothing agents can be further understood by analyzing each of these points.
-
Enhanced Surface Smoothness: Chemical smoothing agents significantly improve surface texture. They interact with the surface of the material, filling in imperfections and creating a smoother finish. This effect is particularly notable in 3D-printed items where layer lines are visible.
-
Improved Visual Aesthetics: Chemical smoothing agents often enhance the visual appeal of products. A smoother surface can lead to a more professional appearance. For instance, products with chemical smoothing have a glass-like finish that attracts consumers.
-
Increased Adhesion for Subsequent Coatings: Chemical smoothing agents can prepare surfaces for better adhesion of paints, sealants, or other coatings. This is essential in industries like automotive or aerospace, where surface integrity directly impacts performance.
-
Reduced Post-Processing Time: Using chemical smoothing can save significant time compared to traditional mechanical methods. For many manufacturers, this translates to lower labor costs and faster production cycles.
-
Enhanced Material Properties: Chemical smoothing can improve properties such as flexibility and durability. For example, ABS plastic parts that undergo chemical smoothing may demonstrate better impact resistance and lower chances of cracking.
-
Compatibility with Multiple Materials: Many chemical smoothing agents work on a range of materials, including plastics, metals, and ceramics. This versatility allows manufacturers to apply a single smoothing solution across diverse product lines.
-
Cost-Effectiveness Compared to Mechanical Smoothing Methods: Chemical smoothing tends to be more economical than mechanical finishing techniques. This option reduces equipment costs and maintains productivity, particularly in high-volume production environments.
Each of these benefits showcases the capabilities and efficiency of chemical smoothing agents in enhancing surface finishes across various materials and industries.
How Does Vapor Smoothing Contribute to Surface Quality in 3D Printing?
Vapor smoothing contributes to surface quality in 3D printing by using vaporized solvents to enhance the finish of printed objects. The process begins with a 3D printed part placed in a chamber filled with vapor. The vapor penetrates the surface of the printed material, which is often thermoplastic. This exposure causes the outer layer of the material to soften and smoothen.
As the vapor dissipates, the softened layer reforms to eliminate rough edges and imperfections. The result is a more uniform and glossy surface texture. This surface improvement increases aesthetic appeal and may enhance functional properties, such as reducing friction and improving the adhesion of paint or other finishes.
Additionally, vapor smoothing can help in post-processing by reducing the visible layer lines that are a common characteristic of many 3D printed parts. This technique can be carefully controlled to achieve the desired level of smoothness without compromising the structural integrity of the print. Overall, vapor smoothing effectively transforms rough 3D printed surfaces into visually appealing and functionally superior finishes.
What Common Mistakes Should Be Avoided for Achieving a Smooth Finish?
To achieve a smooth finish in 3D printing, it is essential to avoid specific common mistakes. Ignoring these mistakes can result in rough surfaces and inconsistent prints.
Common mistakes to avoid for achieving a smooth finish in 3D printing include:
- Using incorrect print settings
- Skipping post-processing steps
- Not maintaining the printer
- Choosing the wrong filament
- Ignoring bed leveling
- Printing at inadequate speeds
Each of these mistakes can significantly impact the quality of the final print. A brief consideration of each point follows.
-
Using Incorrect Print Settings: Using incorrect print settings can cause poor layer adhesion and visible lines. Effective settings include nozzle temperature, print speed, and layer height. Adjusting these settings based on filament type is crucial for optimal results.
-
Skipping Post-Processing Steps: Skipping post-processing steps, such as sanding or polishing, can lead to a rough surface. Post-processing removes imperfections, making the print smooth. Techniques like acetone vapor smoothing for ABS or applying a clear coat can enhance surface quality.
-
Not Maintaining the Printer: Not maintaining the printer can lead to inconsistent prints and malfunctions. Regular cleaning of the nozzle, lubrication of moving parts, and calibration are essential. A well-maintained printer produces smoother prints.
-
Choosing the Wrong Filament: Choosing the wrong filament can impact the finish of the print. Different materials have different properties. For instance, PLA tends to give a smoother finish than other materials. Selecting high-quality filament is essential for achieving a refined surface.
-
Ignoring Bed Leveling: Ignoring bed leveling can result in poor first-layer adhesion. An unlevel bed leads to variations in print height, which creates an uneven surface. Proper bed leveling ensures that the first layer adheres correctly, establishing a smooth foundation.
-
Printing at Inadequate Speeds: Printing at inadequate speeds can create excess material or lead to poor layering. Too fast speeds can cause under-extrusion, while too slow speeds may lead to overheating. Finding the right balance increases the quality of the print’s surface.
By avoiding these common mistakes, 3D printing enthusiasts can significantly enhance the surface quality of their prints.
What Tools and Materials Are Necessary for Effective Post-Processing in 3D Printing?
Effective post-processing in 3D printing requires specific tools and materials to enhance the final output.
- Sandpaper or files
- Paints and primers
- Acetone (for ABS smoothing)
- Heat gun
- Epoxy or resin
- Cutting tools (e.g., hobby knife)
- Cleaning materials (e.g., brushes, cloths)
- Safety equipment (e.g., gloves, masks)
Different users may have varying preferences regarding materials and tools based on their project needs. Some prioritize durability over aesthetic finish, while others may focus on the breathability of materials or the environmental impact. Understanding these diverse perspectives can help in selecting the right tools and materials for specific 3D printing tasks.
-
Sandpaper or files:
Sandpaper or files serve to smooth surfaces and remove imperfections from 3D printed objects. By using various grit levels, users can start with coarse sandpaper for larger flaws and finish with fine grit for a polished surface. Research by the University of Sydney (2022) indicates that proper sanding can reduce post-processing time by up to 30%. -
Paints and primers:
Paints and primers improve the visual appeal of 3D models by providing color and additional protection. Spray paints are commonly used due to their ease of application and smooth finish. The American Society for Testing and Materials (ASTM) notes that priming before painting helps the paint adhere better and leads to a more durable finish. -
Acetone (for ABS smoothing):
Acetone is often used for smoothing ABS prints through a process called vapor smoothing. This method helps in achieving a glossy finish by lightly melting the surface of the print. A study published in the Journal of Materials Science (2021) reported that 95% of ABS users experienced enhanced aesthetics and reduced surface defects using this method. -
Heat gun:
A heat gun can reshape extruded plastic or enhance the surface texture of prints. By applying controlled heat, users can smooth out imperfections or slightly adjust the shape of their models. According to the makerspace, a heat gun can be an effective tool for blending layer lines in PLA and PETG materials. -
Epoxy or resin:
Utilizing epoxy or resin fills gaps and adds structural strength to 3D prints. These materials cure into a solid, durable finish, making them ideal for complex prints needing additional bonding. A 2019 study by researchers at Stanford University found that combining epoxy with 3D prints can improve tensile strength by nearly 40%. -
Cutting tools (e.g., hobby knife):
Cutting tools, such as hobby knives, are essential for trimming off support structures and excess material. A detailed and precise cut can significantly improve the final appearance of a print. The Craft Industry Alliance (2020) emphasized the importance of using sharp tools to prevent damage to the model. -
Cleaning materials (e.g., brushes, cloths):
Cleaning materials are necessary for removing dust and debris from prints before painting or sealing. A soft brush can clear fine powder from prints, while a lint-free cloth ensures no residue remains. Studies show that cleanliness during post-processing can enhance paint adherence significantly. -
Safety equipment (e.g., gloves, masks):
Safety equipment ensures the user’s protection during post-processing. Gloves protect hands from chemicals, while masks guard against inhaling harmful fumes. The CDC recommends proper safety gear when working with volatile substances, highlighting potential health risks associated with inhaling vapors from acetone or resin.